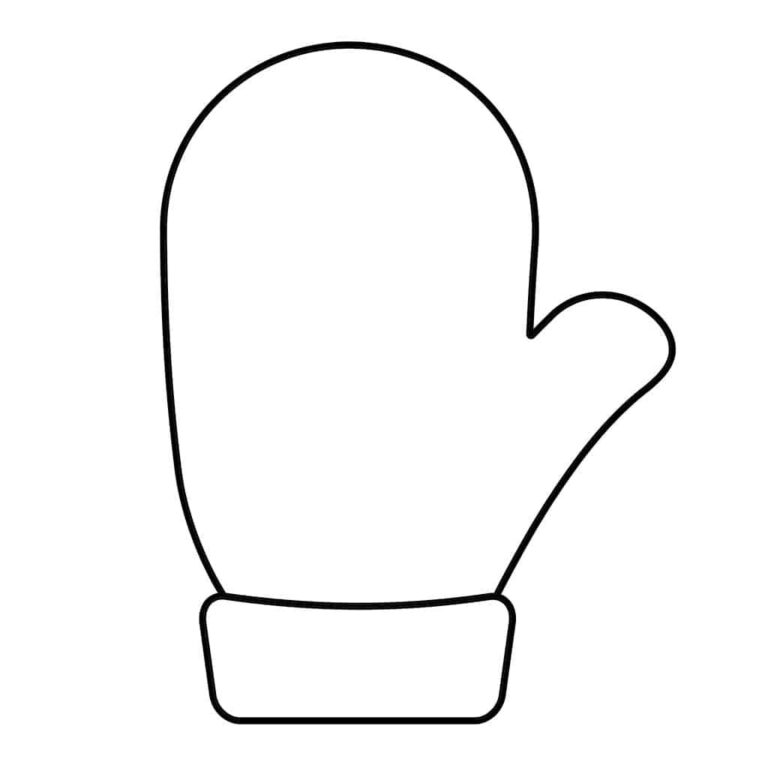
Mittens are a popular winter accessory that can keep your hands warm and stylish during the chilly season. If you’re looking to create your own mittens, a template can be a helpful tool to guide you through the process. Here is a guide to creating a template for mittens.
First, you will need to gather materials such as a piece of paper, a pencil, and a ruler. You may also want to have a protractor on hand for more accurate measurements.

Next, place your hand flat on the piece of paper and trace around it with the pencil. Make sure to keep your fingers slightly apart to ensure a comfortable fit. Once you have traced your hand, remove it from the paper.
Using the ruler, draw a straight line down the center of the traced hand. This will serve as a reference point for the rest of your template.
Next, use the protractor to measure the angle of your thumb. Draw a line from the bottom of your traced hand to the top of the thumb line. This will create a V-shape at the bottom of the mitten template, allowing for a comfortable fit around your thumb.
After creating the thumb shape, use the ruler to draw a line around the top of the traced hand. This line should be slightly curved to mimic the shape of your wrist.
Finally, use the ruler to draw a line from the tip of each finger to the top of the wrist line. This will create a basic mitten shape.
Once you have completed your template, cut it out and use it as a guide for cutting out your fabric. You can use a variety of fabrics such as wool or fleece for added warmth and comfort.
In conclusion, creating a template for mittens can make the process of making your own mittens easier and more efficient. With a few simple materials and some basic measurements, you can create a template that will fit your hand perfectly and provide warmth and style during the winter season.